Friday, October 25, 2013

New Baby, Azure Standard and Applesauce

Hi All!,

Firstly, I know that I've been MIA for a while. A brief update on what's been going on in my life: I got pregnant and had another baby! I now have two children under the age of 2......actually I have two children under 18 months because Tres is only 16 months, crazy I know.

Introducing my second son: Nehemiah


Have any of you heard of Azure Standard? If not, it's a organic and natural food grocer that does monthly drops to various communities across the country. They've finally made it to Michigan and we're SUPER excited at my house. So excited in fact that I volunteered to be the drop site manager. (So if you live in/near southeastern Michigan and would like to join us please contact me, here's a link to our Facebook Group). Azure coming to my community is really going to help me get our kitchen the way I want it (read organized and functional). Additionally it'll give me some fresh material to post about, especially while I work on the organization part.


If you're interested in seeing Azure has a drop near you contact the trucking company they use, Covenant Ranch Trucking, 785-380-0034. They'll be more than happy to let you know what's near you. If there's not one, start raising awareness in your area and maybe they'll expand to you.

Today was my community's first drop and it went pretty well. I bought a pretty good haul, it included oats, basmati rice, broccoli florets, strawberries and gala apples. LOTS AND LOTS of gala apples..............20lbs to be exact. What do I plan to do with all those apples? Make applesauce of course!


Strawberry Applesauce
adapted from Family Feedbag

5 lbs apples (I used organic gala but whatever tickles you is fine)
2 lbs strawberries (fresh or frozen)
3 cups of water

Special equipment: chinois

Steps:

  1. Wash fruit
  2. Quarter apples (If you're not using the chinois then you'll probably need to peel core the apples as well........sorry)
  3. Add apples, strawberries and water to a large pot. Cook on high until water begins to boil, then turn down to medium and simmer for about 35 minutes.
  4. If you using the chinois, then spoon into the the chinois and press through using the wooden dowel. If you're not using the chinois, then process with whatever you have (food processor, blender, immersion blender).
  5. Chill and enjoy


If desired, you could can whatever excess you/your family is not going to eat right away, which I was going to do. HOWEVER, I did not have the correct size Weck jars on hand to do so. I only have large mason jars but I have gotten away from canning with regular mason jars since I found out that there's BPA in the compound used on the sealing lid. Due to this I ended up freezing my excess applesauce in the mason jars instead which is quicker and less labor intensive. I have an upright freezer in my basement, if you don't then eat quickly. LOL.

A word on organization: I didn't mention previously that I purchased 25 lbs of oats and rice, so I'm searching for cute jars to store it in on my counter. I've been thinking about the Anchor Hocking Heritage Hill jars, the question is what size? I'm torn between the 1 gallon and 2 gallon for oats, flour, rice and wheat berries. What do you guys think, would a 2 gallon glass jar be to big?

Until next time, 
Kellan

Thursday, January 17, 2013

Fruit on the Bottom Yogurt (or top)


One of my all time favorite snacks is yogurt, especially fruit on the bottom strawberry Chobani. Only problem is that I feel guilty every time I eat one. Why? Basically they go against a lot of the new guidelines that I set for myself. In the grand scheme of things Chobani is one of the better yogurt option on the market but I still felt bad for the following reasons:


  1. Chobani is non-fat yogurt - I don't do non-fat, low fat or skim anything for a number of reasons but they all break down into 3 main categories: if it was suppose to be fat free God would have made it that way, fat makes everything more delicious and fat is necessary to absorb a number of vitamins and minerals. (So all you guys eating salad with fat free dressing, it's not doing ANYTHING for you)
  2. Too many ingredients - I looked up the ingredients here. I'm always skeptical when a label says "natural flavors". What exactly does that mean? Also, groupings such as, fruit and vegetable juice concentrate, makes me leery. Why can't they just say what fruit and vegetable juice concentrate it is? And what is locust bean gum? My new rule is to try to stay under 5 ungrouped ingredients that I can readily identify. 
  3. It's expensive - I don't know about where you live but in Southeastern Michigan, Chobani yogurts are usually retail for $1.50 each. We eat a lot of yogurt, $1.50 adds up rather quickly.  
So I set out to make my own fruit on the bottom yogurt that was just as tasty, cheaper and better for my family. I think I did a pretty good job AND it's super easy. 

Homemade Fruit on the Bottom Yogurt

Makes a dozen 5.6oz yogurts
  • 20 oz frozen fruit (preferably organic), I used strawberries
  • 1/4 cup honey
  • 1 quart yogurt (preferably raw and/or homemade)
Just as an FYI 20 oz of frozen fruit is usually two of the smaller bags.

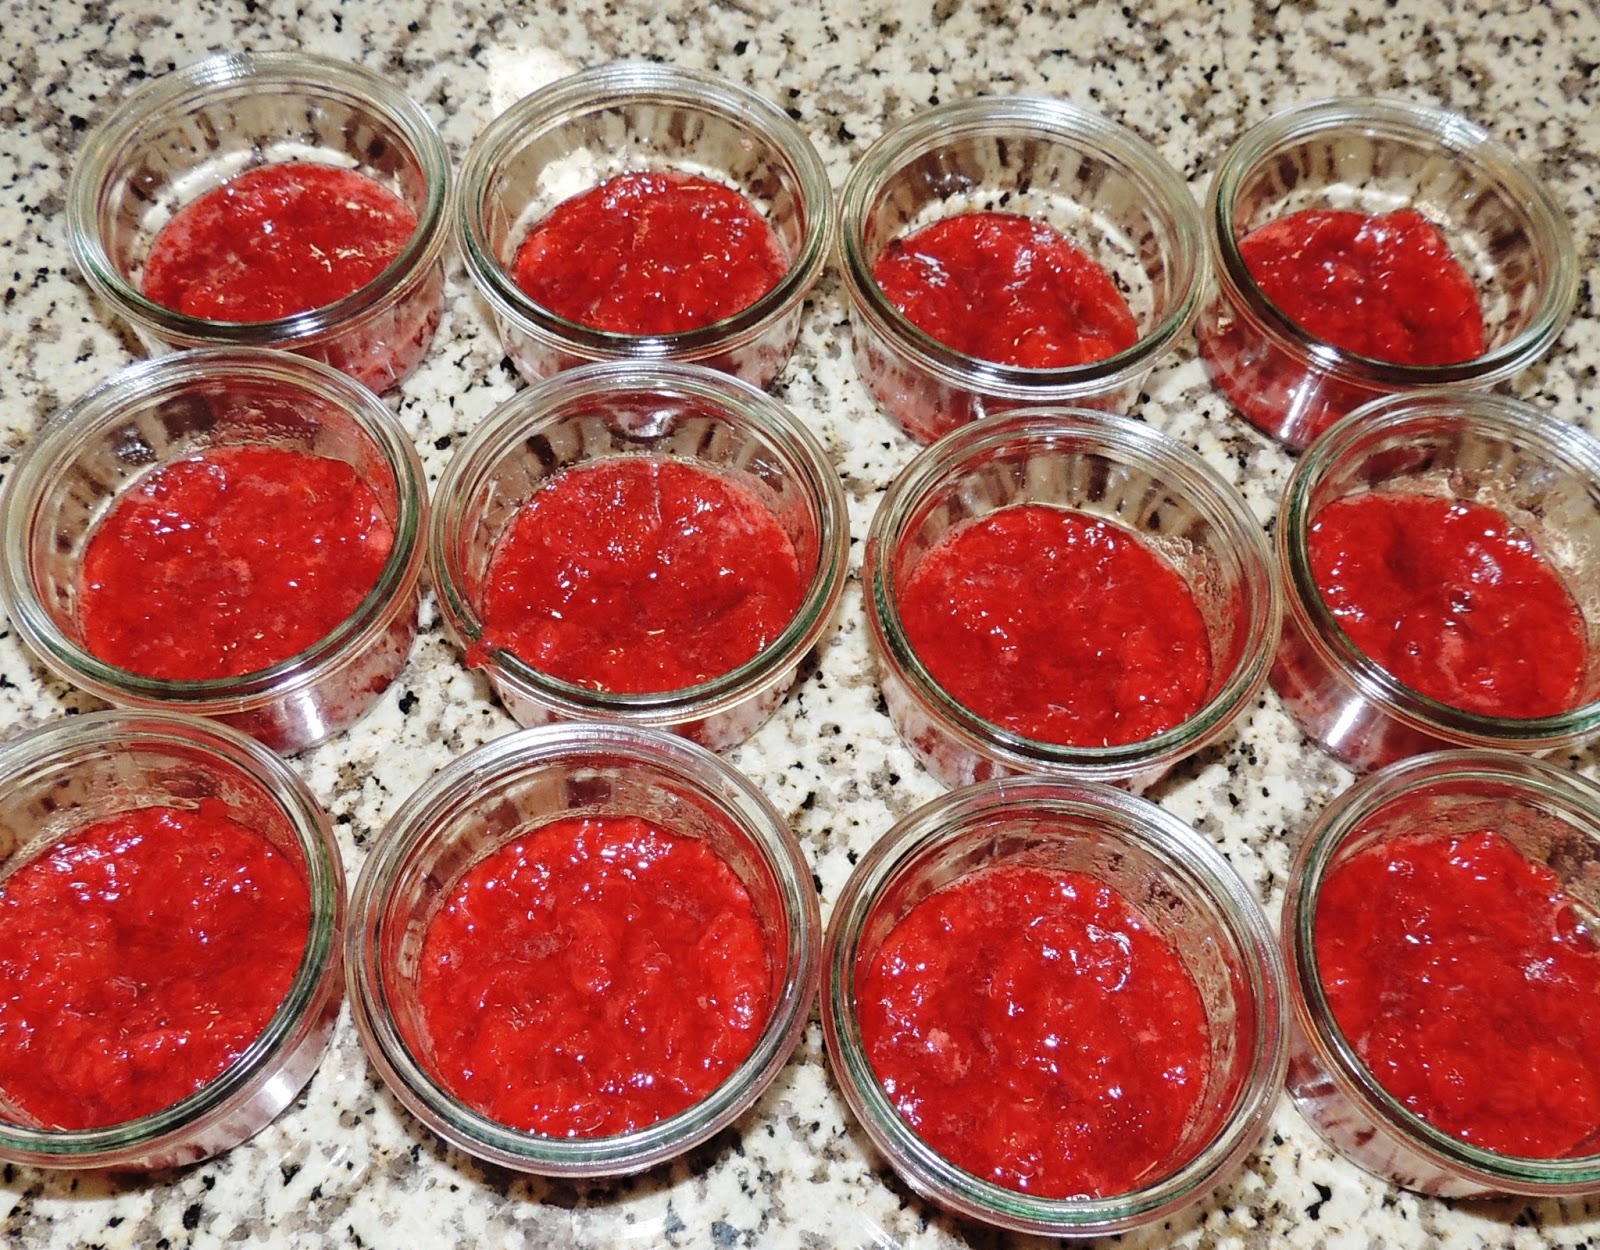
Dump the frozen fruit and the yogurt in a sauce pan, pour on honey. 

Cook for about 40 minutes on medium heat stirring occasionally. It will get frothy.

Let fruit sauce cool completely then divide evenly amount containers.

Top with yogurt and either enjoy now or store and enjoy later!

It's that simple. I recently discovered Weck jars, which are what I store my yogurts in. They're canning jars typically used in Europe but, like our beloved mason jars, have lots of other uses. I really like these because they have glass tops. I don't know if you heard but apparently there's BPA in the lids used for mason jars (depressing, I know).  

I think this will work with any fruit. We like strawberry so that what I made but you might like something else. Let me know how it turns out.

Until next time,
Kellan

Thursday, January 10, 2013

Soaked Pancakes for Now and Later

I've decided that in 2013 I am going to work on getting rid of all processed foods. In order to do that I need to make large batches and freeze the extras. Now the real question is how am I going to achieve that feat, considering the first quarter of the year is always a hectic time for me. My plan, do 1 or 2 recipe conversions a week and freeze the extras. This week's recipe: PANCAKES!!!!

I love pancakes. Love. Love. Love. Pancakes. Here's how I make them:


Soaked Whole Wheat Pancakes


11.2 oz sifted whole wheat flour
2.5 cup filtered water
3 tbsp whey
1.3 oz sugar
0.2 oz baking soda
0.4 oz baking powder
0.2 oz salt
0.5 – 1 cup buttermilk
3 eggs
2.7 oz butter

Sift whole wheat flour to remove most of the bran, discard bran.

Weigh out 11.2 oz of the sifted flour. Add water and whey. Mix and cover with towel for at least 8 hours. You should have something that looks like this:

After the soak, strain all the extra water off the wheat.

Mix in remaining ingredients and make pancakes as usual. 


This recipe makes about 20 LARGE pancakes. To freeze for future eating, just place the pancakes on a cookie sheet in a single layer and put in the freezer for a few hours. I didn't have enough cookie sheets for that so I separated my pancake layers with cling wrap.

(My sad empty freezer) Once fully frozen bag as you see fit. I'm able to fit 2 pancakes in a quart size freezer bag. To reheat put in a 350 degree over for 10-15 minutes.

The real question is if the pancakes taste the same and have the same texture after being frozen. The honest answer is yes and no. Yes, they taste just as delicious but no they don't have the same texture initially. I found that after being reheated in the oven they were a little crisper then when I originally made them but once I slathered on the butter I couldn't tell the difference.

I forgot to take a pic before I started eating............don't judge me.

Overall I would say this experiment was an awesome success. If you'd like to read more about the importance of soaking grains please check out this post by Sarah the Healthy Home Economist.

Until next time,

Kellan

Thursday, November 15, 2012

Recipe Experiment: Taco Seasoning

I have a confession: I love beef. Like really  really love it. It's rare that I eat meat other than beef, thus I'm always looking for new things to do with it. That being said, I thought I would share one of my quick go to dinner recipes: TACOS!!!!!!!!! (Or taco salad at our house)

There was a LONG period where I didn't eat tacos because I couldn't find taco seasoning from a grocery store that I would even consider consuming. I took me a few months to find a recipe that I actually liked and then tweak it until it was perfect. My inspiration recipe came the Food Renegade blog, the recipe as posted I found to be a little bland for my taste but it was a great place to start. This recipe works with beef, poultry or pork, it's just that awesome.


Homemade Taco Seasoning


Per pound of meat, mix the following spices:
2 Tbsp chili powder
1/2 tsp garlic powder
1/2 tsp  onion powder
1/2 tsp dried oregano
1 tsp smoke paprika
3 tsp ground cumin
Salt and Pepper to taste


  1. Mix together all spices except salt and pepper; set aside. 
  2. Season meat with salt and pepper; brown
  3. Pour taco seasoning over browned meat, stir. 
  4. Add 1 1/4 cup to 1 1/2 cup of water per pound of meat; cover and simmer until reduced. Stir occasionally.
The amount of time that you allow the meat to simmer and reduce depends on your personal preferences (how much sauce you like). When I'm making meat for taco salad I leave a lot of sauce because it's the most awesome "dressing" but when I'm making tacos I don't like lots of sauce because I make a huge mess. 

I hope you enjoy this recipe as much as we do. We eat taco salad at once a week (sad I know). I'm currently perfecting homemade fruit snack. EXCITING!

Until next time, 
Kellan


PS: Look at Tres.........he's SO cute!


Monday, November 12, 2012

The Move

This moving experience has been A LOT more than I originally assumed. We're almost completely unpacked. The last part of the house that needs works is my office/craft area. It currently looks like this:


I've gotten almost everything sorted, just have to find a home for all of it. Please bear with me a few more days. I'm hoping to have everything put away by the end of week.

Until next time...........

Friday, August 3, 2012

Cloth Diapering: Our Setup

Hey!

If you read my last post you know that I was pregnant with my first child. Tres was born June 22 at 8:55pm. He weighed 7 lbs 14 oz and was 20 inches long.


He has been a great addition to our lives. I thought I would take some time to write out my experience with cloth diapering. Long before I ever got pregnant I decided that when I had children they would be cloth diapered, my husband wasn't sold on the cloth diapering at first but he has come around.

Making the decision to cloth diaper isn't a simple one, it is definitely more than just saying "I'm going to cloth diaper". That is a great start but you have to decide things such as :what kind of cloth diapers you are going to use, whether to use a diaper service or not, what kind of detergent to use, how many diapers to buy, etc. When it comes to cloth diapering execution is very individualized, what works well for me might not work well for you and that's ok. I'm hoping by explaining our setup and how we decided upon this setup we will be able to help someone decide to cloth diaper their children. Remember: Cloth diapering is best for your baby and the environment.

Our Setup
Our current cloth diapering setup consists of 36 prefolds, 8 covers and 26 cloth wipes.

When I was deciding which cloth diapers I was going to be using I considered 4 things

  • Cost
  • Ease of use
  • Construction materials
  • Laundry options
As far as cost is concerned, to me one of the many advantages to cloth diapering is saving money. The price of cloth diapers can vary greatly, it just depends on what you choose. I chose unbleached prefolds from Green Mountain Diapers, based on my research these are the best prefolds on the market. Green Mountain prefolds come in sizes, we decided to skip the newborn size and go directly to small. The small size is suppose to fit babies 10-15 lbs. I had a feeling that Tres would be about 8 lbs at birth and I was fine with the prefolds being a little  big for a couple of weeks. The small prefolds from Green Mountain Diapers are $28/dozen.

Prefolds require some sort of diaper cover, there is no getting around that. I knew that I didn't want to have to have four or five sets of diaper covers, so I was looking for covers that could be grow with my baby. I ended up deciding on Thirsties Duo Wrap. These covers come in two sizes, size 1 is for babies 6-18lbs and size 2 is 18-40 lbs. The covers come in great patterns and colors but even better they are only $12.75 each and are available for free 2 day shipping if you have an Amazon Prime account (which everyone should have, it's awesome). The duo wrap comes in snaps or velcro, I chose snaps because while researching I found that babies learn to open the velcro and take the diapers off. That's not something that I ever want to experience. 

I made my own cloth wipes. My wipes are 10x10 squares made from two pieces of flannel. I bought 4 yards of flannel to make the wipes from Joann's, with a 50% off coupon the fabric only cost me $13. I have found that 26 wipes are not enough. I'm going to make a tutorial on making the cloth wipes once we get moved and unpacked.

Lastly would be laundry options. I knew that I didn't want to use a diaper service because I am very particular about how my laundry is done and what products are used. I found that the type of detergent used on cloth diapers is very important because it is possible for the diapers to loose their absorbency if the wrong detergent is used. I'm lucky enough to have a cloth diaper store close to me and they have a great website. One of the sections in the information section which includes detergents they recommend and washing instructions. I chose to use Tiny Bubbles detergent because it is not scented. (I hate the artificial scents that are used in cleaning products. If you're a person that like scents I believe Rockin' Green has a lot of options to choose from) I will admit that Tiny Bubbles is a little pricey but I was able to buy the 6 pack from Amazon which saved me almost $30.

We also have two diaper pail liners, 3 snappis and a diaper pail. To date we've spent just under $300. In the future we will have to purchase bigger prefolds and covers. As of right now I believe I am going to 3 dozen medium and 3 dozen x-large prefolds as well as 8 size two covers, so I anticipate spending another $300. I don't think that $600 is bad. 

Washing
Laundry is extremely simple. We received diaper sprayer as a gift. Sometimes we use it..........sometimes we don't. The poop of breastfed babies is water soluble so it is not a big deal that we don't spray the poop off in advance. We literally just throw all the diapers, wipes and the pail liner in the washer together with hot water and everything but the covers go in the dryer. That's it! Easy peasy. 


Here's a recent picture of Tres in one of his diapers:

Until next time,
Kellan


Sunday, March 11, 2012

Grind Your Own Meat!!!!! 70% of Ground Meat at Supermarkets Contain "Pink Slime"

I was reading blog posts today in my Google Reader and came across this post from Backyard Farming. The cut and dry of it is that 70% of ground meat sold at supermarkets contains "pink slime". Pink slime is basically trimming that would usually be used for pet food that has been sprayed with ammonia to make it "safe" for eating. What's safe about eating meat sprayed with ammonia? I would think that is something that a person would do if they're trying to kill someone. See the video below if you don't believe me.


What's the solution? Grind your own meat. It's not hard and it doesn't require expensive equipment. I've been saying to myself that I was going to grind my own meat for a long time, well the time is now. Alton Brown did an excellent tutorial on his show Good Eats about using a hand grinder (he was making pork sausage but it's the same technique), which I found on Youtube. Please view the clip, the part about grinding meat start at the 5 minute mark.


I found the exact grinder that he's using in his video on Amazon and it's only $35. I will be ordering one as soon as I finish this blog post. You can also "grind" meat in the food processor if you have one, it's not going to be as fine of a texture but it will get the job done. 

Pass the word!

Until next time, 
Kellan

Wednesday, March 7, 2012

Cleaning Periodic Table

I'm back...............


So if you read my last blog post, which admittedly was a while ago, you already know that I'm pregnant with my first child and have been super busy. Aside from being pregnant (which is a roller coaster ride) and mentally preparing for labor, I am also running a business, doing tax returns, looking for a house to buy and finishing grad school. So while I've thought about all the projects that I could be doing, I've had neither the energy nor motivation to actually do one. I recently decided that I need to get more organized before the baby is born and while perusing the internet for ideas I came across an article which spoke about a periodic table of clean that was made by Real Simple Magazine. My first thoughts were "this is awesome", the problem was I couldn't find it online. Apparently Real Simple removed the chart from its website. After a lot of digging I finally found a copy online and while it was awesome, it didn't quite fit my needs. So I decided to make my own. 


This is the periodic table of cleaning that works for me. I'm sure that there's something different that works for you. I uploaded the Excel file that I used to make my periodic table to my Google Docs, if you click on the upcoming link you can download the file and change it what fits you. Click here if you would like to make your own chart.

Happy cleaning and organizing!


Until next time, 
Kellan

P.S. I have lots of fun and easy baby projects coming up!

Thursday, November 3, 2011

NEWS

So I've been MIA for a little over a month know, and by now I'm sure you've started to wonder if I had given up all together. I DID NOT GIVE UP!!!!!!!

That was a little theatrical but that's how I'm feeling these days. I'm pregnant! I haven't been blogging because I haven't felt like doing anything. Morning sickness was/is kicking my butt, however I think I might have that under control now. (Hopefully). I will be back with lots of cool stuff, as soon as I get myself together. 

Until next time, 
Kellan

Sunday, September 11, 2011

Tips and Prep Work for the Future

A few months ago I came across Nourishing Traditions by Sally Fallon and started reading it. First, this is an awesome book that everyone should own......not rent from the library, BUY IT. There's simply too much information in the book to get any real benefit from it if you don't own it. In short, Sally Fallon talks about the importance of eating a wholesome diet that is prepared in a traditional way. Nourishing Traditions starts off with a introduction section which gives detailed information about the difference components of food, i.e. fats, carbohydrates, proteins. The introduction section is the first 78 pages of the book. Pages 79 through 620 are all receipes, awesome recipes that address every aspect of cooking and eating that ANYONE, including me, could phantom. The remaining 56 pages are appendices, including a sources section, that are really helpful if you're really trying to make a change to cooking and eating in a more traditional manner. 

In the future a lot of my cooking posts/experiments are going to hail from information I found in this book as well as a few traditional cooking blogs. Having said all that, if you would like to experiment along with me you need to know about an important bit of information that I found out recently and do some prep work. 

Important Information
While reading The Healthy Home Economist blog, I recently came across a post entitled "Whole Grains Cause Cavities?" The blog's author, Sarah, attended the 2010 Wise Traditions Conference, where author Remi Nagel presented. During the presentation, Mr. Nagel made an observation about traditional cultures that had been somewhat overlooked in the past: Traditional cultures typically do not use the entire grain, they remove the bran. He suggests that bran from wheat, spelt, rye, kamut, barley, corn, millet and oats be removed through sifting or sieving. Rami Nagel also suggests that whole grains MUST  be soured first to significantly reduce phytic acid. Phytic acid, aside from hindering the absorption of mineral in grains, is a major cause of why whole grains cause cavities. According to Sarah,  Mr. Nagel states the best method for souring grains, thus significantly reducing phytic acid is to soak grains in a mixture of filtered water and liquid whey. The ratio is 1 cup of grains to 1 cup of filtered water plus 1 tablespoon of liquid whey. 

Prep Work
All that information lead to your prep work. Sarah did a great step-by-step post and video of how to make liquid whey (yes, you have to make it yourself). Please watch that and complete the steps. 

Also, grind and sift your grains. Put them in the freezer when done. 

Lastly you're going to need some sort of fabric bowl cover. As soon as my camera is done charging I'm going to do a tutorial on how to make awesome reuseable bowl covers and we will be all set to start on start preparing food in a traditional manner. 

Until next time, 
Kellan

P.S. I'm SUPER excited about this!!!!!!!


Thursday, September 1, 2011

Belief and Faith: Luke 8:40-48

I'm going to stray away a little on today's post from what I usually write about. If you've read the purpose of this blog you know that I write this as a means of sharing my experiences with trying to live a healthier and greener lifestyle, and to me that includes working on my relationship with God. I believe that it's important to work on the spiritual aspects of my life as well as they physical, thus from now on there will be the occasional posts about faith. Having said that, I've been in conversation with God a lot lately regarding some aspects of my life and yesterday I had a serious revelation that I feel that I need to share with as many people as possible.

The Faith to Make Things Happen


Have you ever wanted something, prayed for it, had God speak to you telling you that he would bless you with it and then didn’t receive it? Have you ever wondered why? Do you then question if God had really spoken to you or if you were simply all in your mind? I’m going to be honest, I have. Actually I often find myself in this situation and as I’ve been earnestly working on myself lately I wanted to know why. I asked God to show me why these situations occur in my life and I was honestly a little shocked by the answer: We often don’t receive our blessings because we don’t truly believe that God is and can.

Now I’m sure after reading that one line some of you reading this are pissed off. You thinking “Of course, I believe God is and can.” But do you really? Truly think about how you live your life and the words that come out of your mouth. I’ll give you an example from my personal life. At the age of 17, I began having debilitating migraines that grossly affected my quality of life.  I spent countless hours in the hospital and racked up a lot of money in hospital bills. I’ve had pretty much every neurological test run on me possible and from a medical prospective, nothing is wrong is me.  I’m perfectly healthy. No doctor could explain why I continued to have these migraines and the medication they gave me didn’t work, they were stumped and eventually I accepted that this problem would just be a part of my life. I didn’t have them very often so it wasn’t that big of a deal or so I thought. Recently I began having migraines back to back, again the doctors ran tests and again found nothing wrong. I changed my eating habits, my lifestyle and it changed nothing. Finally I became desperate and in my desperation turned to God. I prayed to God asking him to heal me. The next day I woke up and I felt better, everything seemed so clear, it was as if fog had been lifted from around me.  This went on for a few days and then one day I ate something that under my new healthy diet I shouldn’t have eaten and I didn’t drink the amount of water that I was supposed to drink and as the night came to a close I began being fearful of what the next day would bring. I began to fear losing the clarity that I had recently received or even worse having a migraine because of what I had eaten and what I hadn’t done. A few days later I did have a migraine, in terms of pain it was mild but it took a lot out of me. I was in bed, in the dark for almost 36 hours.  When I came back to my right mind I began to pray and ask God why this was happening to me. I believed that God was trying to teach me something but I couldn’t figure out what it was, today God revealed plainly the purpose behind all this. He was trying to get me to understand this point: People pray and say that they have faith in God but then act and/or speak is a manner that is contradictory to what they just professed. I’ll go back to the example I just gave regarding my migraines. I prayed and asked  God to heal me but then when I did something that went against the “lifestyle changes” that I had made in an attempt heal myself, I freaked out and became fearful  of what the outcome would be based on those actions. If I truly believed that God had healed me would it matter that I only drank 50 oz of water instead of 75 or that I ate Little Caesar’s pizza for dinner? No. Now I should try to be as healthy as possible, which would include being properly hydrated and eating a wholesome diet? Yes, of course but one day of compromise shouldn’t make or break me. My healing isn’t due to anything that I have done or could ever do, my healing comes from God. If I could have healed myself, I would have been healed a long time ago.

God lead me to Luke 8:40-48, which gives an excellent example of someone with a similar situation. When I compared myself to the woman in Luke 8:40-48, we had a lot in common.  The Bible says that the woman had been afflicted with hemorrhages, bleeding, for 12 years. She had spent every penny she had and no one could help her. At this point, this woman had to believe that her affliction was a part of her life, as I did. She understood that there was nothing that she could do to heal herself but she believed that Jesus could heal her. Think of how great her faith must have been, she believed so much that Jesus didn’t have to take the time to acknowledge her, that He didn’t have to touch her, she believed that if she touched his clothing that she would be healed.  What could we all do if we had faith like that?

The second thing that I took from this woman is this: When you have faith that God is going to bless you move forward as though you’ve already received the blessing. When the woman explained to Jesus why she touched Him, the Bible says “In front of all the people, she blurted out her story – why she touched him and how at that same moment she was healed.” Now let’s be completely realistic for a second, this woman suffered from hemorrhages aka bleeding, so I wouldn’t imagine that she suddenly felt herself stop hemorrhaging and yet when we presented her case before the crowd she told them that at the same moment she touched His robe she was healed. If you think about a situation in your life in which you’ve asked for something and it seems like nothing is happening have you ever considered the possibility maybe nothing is happening because you haven’t moved forward. So let’s give this point a real life scenario. Let’s say that your dream in life is to own a business. You pray about it, but that’s all you do. You never actually act. How is God supposed to make your business prosperous when you never start it? It’s just as important to move forward as it is to believe that God can and will. The act of moving forward is a outward expression of the faith that you have in God and the belief in what He’s promised you. What’s holding you back? What step do you need to take to start receiving your blessings? I know it’s cliché but everything starts with a leap of faith. 

Until next time, 
Kellan

Thursday, August 25, 2011

A Quick Health Tip

Hi Guys, 

So as you know I've been actively working on losing weight. I haven't weighed myself in a while but at last weigh in I had lost about 10 lbs. I'm definitely seeing a difference in my appearance and my family has been seeing the difference (great for my ego). Anyways, I've been really working on being healthier so I've made some life changes and picked up some new habits. One of my new habits is going to Bikram Yoga, which is AWESOME. I've really been enjoying it. I've taken to eating a mostly organic diet, which is a little difficult because I'm trying to do it as inexpensively as possible but I'm making good progress. I'll give some specific examples in next week, I'm trying to compile at least a week worth of real life examples and costs. 

A quick health tip I recently learned is that the number of ounces of water that a person is supposed to consume in a day should equal half their body weight. About 20% of that water comes from your food if you eat a healthy diet. Did you know that? I sure didn't. So for me, I would need to consume about 100 oz of water in a day. That's a lot, but I've come up with a great way to space it out so that I can get it all in. Pray for me, it's not easy.

There will be some new tutorials coming up in the upcoming week. Since we now have a video camera, I felt that I should actually use it. So I did an experiment, video taped it, and was almost finished editing it when my husband watched it. I, of course, usually do experiments while he's at work and we don't have any kids, which means I don't have anyone to hold the camera, so I'm not actually seen in any of the video. He didn't like that. He wants it to be absolutely perfect for you guys so I have to start over with his assistance. 

Until next time, 
Kellan

Thursday, August 11, 2011

"Real Food" Evangelist

I think this is a video everyone should see.

Saturday, July 2, 2011

Battling the Bulge

Hola!

I have some great new experiments to share, I just need to get a couple of supplies in. I plan to order them Tuesday so hopefully I have some new posts next week. 

In my last post I stated that I was going to start actively working on losing weight............Yea, that didn't really happen. I've created a new clog to follow my weight loss journey, it's called Kellan Battles the Bulge. I would really appreciate if you follow that blog as well, I really need people to be accountable to. 

Thanks so much.

I can't wait to show you what I've been working on. 

Until next time, 
Kellan

Wednesday, June 8, 2011

New Life Chapter

ALOHA!!!!!

So I’ve been MIA for a while. I’m sorry…….I’ve been preparing for my wedding, then I had my wedding, then went on my honeymoon and since being back I’ve been trying to adjust being at home again. So I’m back and functioning again.

My wedding was absolutely beautiful. This is my favorite picture.


Since we’ve been home I’ve been trying to figure out what changes I need to make to be the person that I want to be in this new chapter of my life. I’ve determined that one thing I really need to work on is discipline.  So I’m assigning myself one thing to master at a time.

Task #1: Weight Loss

I’ve been “losing weight” for going on 4 years now and think I’ve lost a total of 5 lbs (maybe). The reason that I haven’t actually lost any weight isn’t because I struggle, it’s because I never put forth effort. So it’s official, I’m going to lose weight. My first goal is to weigh 200 lbs, I’m currently weigh 225 lbs.

My research has told me that they key to successful weight loss is having a good breakfast every day. Well what is a good breakfast? My grandmother raised me to believe that a good breakfast involves pork of some sort; her personal favorite is Bob Evan’s sausage. While I LOVE my breakfast pork, I’m going to cut back, especially during this first 25 lbs.

My go to breakfast food is going to be oatmeal, but I think instant oatmeal is disgusting and cooking oatmeal on the stove doesn’t come out as creamy as I would like so I make oatmeal in my crockpot.


Overnight Crockpot Oatmeal

Original Recipe
1 cup rolled oats (NOT Quick Oats!)
4 cups water
1/2 cup milk
1/4 cup brown sugar
1  TBS butter
1/2  tsp vanilla extract
1 tsp cinnamon

Combine all in glass or ceramic bowl that will fit in your crockpot.
Fill crockpot about 1/3 full with water
Place the bowl in crockpot
Put on lid and cook on low for 10hrs. 


This is A LOT of oatmeal. There's no way I would ever be able to eat all that oatmeal, maybe half but not all of it. Below is the nutritional information if you were to eat ALL the oatmeal, which I guess if you eat 3 meals a day isn't that bad from a calorie prospective, but it is a lot of sugar. 

Nutrition Facts
  1 Serving
http://assets3.sparkrecipes.com/spacer.gif
Amount Per Serving
http://assets3.sparkrecipes.com/spacer.gif
  Calories
580.2
http://assets3.sparkrecipes.com/spacer.gif
  Total Fat
7.5 g
http://assets3.sparkrecipes.com/spacer.gif
   
  Saturated Fat
3.5 g
http://assets3.sparkrecipes.com/spacer.gif
   
  Polyunsaturated Fat
4.1 g
http://assets3.sparkrecipes.com/spacer.gif
   
  Monounsaturated Fat
4.1 g
http://assets3.sparkrecipes.com/spacer.gif
  Cholesterol
9.8 mg
http://assets3.sparkrecipes.com/spacer.gif
  Sodium
94.8 mg
http://assets3.sparkrecipes.com/spacer.gif
  Potassium
874.5 mg
http://assets3.sparkrecipes.com/spacer.gif
  Total Carbohydrate
184.5 g
http://assets3.sparkrecipes.com/spacer.gif
   
  Dietary Fiber
17.7 g
http://assets3.sparkrecipes.com/spacer.gif
   
  Sugars
79.3 g
http://assets3.sparkrecipes.com/spacer.gif
  Protein
14.1 g
http://assets3.sparkrecipes.com/spacer.gif
  Vitamin A
4.7 %
http://assets3.sparkrecipes.com/spacer.gif
  Vitamin B-12
0.0 %
http://assets3.sparkrecipes.com/spacer.gif
  Vitamin B-6
9.7 %
http://assets3.sparkrecipes.com/spacer.gif
  Vitamin C
1.5 %
http://assets3.sparkrecipes.com/spacer.gif
  Vitamin D
12.5 %
http://assets3.sparkrecipes.com/spacer.gif
  Vitamin E
5.4 %
http://assets3.sparkrecipes.com/spacer.gif
  Calcium
32.9 %
http://assets3.sparkrecipes.com/spacer.gif
  Copper
59.8 %
http://assets3.sparkrecipes.com/spacer.gif
  Folate
22.0 %
http://assets3.sparkrecipes.com/spacer.gif
  Iron
51.5 %
http://assets3.sparkrecipes.com/spacer.gif
  Magnesium
75.4 %
http://assets3.sparkrecipes.com/spacer.gif
  Manganese
411.9 %
http://assets3.sparkrecipes.com/spacer.gif
  Niacin
7.7 %
http://assets3.sparkrecipes.com/spacer.gif
  Pantothenic Acid    
21.0 %
http://assets3.sparkrecipes.com/spacer.gif
  Phosphorus    
83.6 %
http://assets3.sparkrecipes.com/spacer.gif
  Riboflavin
13.1 %
http://assets3.sparkrecipes.com/spacer.gif
  Selenium
1.9 %
http://assets3.sparkrecipes.com/spacer.gif
  Thiamin
79.5 %
http://assets3.sparkrecipes.com/spacer.gif
  Zinc
41.6 %


I don't mind refrigerating leftover oatmeal and eating it later but if you don't like to do that then here is a recipe for an individual serving.

Individual Serving
¼ cup rolled oats
1 cup water
2 tbsp milk
1 tbsp brown sugar
1 tbsp butter
½ tsp vanilla extract
1 tsp cinnamon

Combine all in glass or ceramic bowl that will fit in your crockpot.
Fill crockpot about 1/3 full with water
Place the bowl in crockpot
Put on lid and cook on low for 8hrs. 


Nutrition Facts
  1 Serving
http://assets3.sparkrecipes.com/spacer.gif
Amount Per Serving
http://assets3.sparkrecipes.com/spacer.gif
  Calories
111.7
http://assets3.sparkrecipes.com/spacer.gif
  Total Fat
1.6 g
http://assets3.sparkrecipes.com/spacer.gif
   
  Saturated Fat
0.7 g
http://assets3.sparkrecipes.com/spacer.gif
   
  Polyunsaturated Fat
1.0 g
http://assets3.sparkrecipes.com/spacer.gif
   
  Monounsaturated Fat
0.9 g
http://assets3.sparkrecipes.com/spacer.gif
  Cholesterol
1.2 mg
http://assets3.sparkrecipes.com/spacer.gif
  Sodium
14.1 mg
http://assets3.sparkrecipes.com/spacer.gif
  Potassium
197.9 mg
http://assets3.sparkrecipes.com/spacer.gif
  Total Carbohydrate
34.8 g
http://assets3.sparkrecipes.com/spacer.gif
   
  Dietary Fiber
5.4 g
http://assets3.sparkrecipes.com/spacer.gif
   
  Sugars
7.1 g
http://assets3.sparkrecipes.com/spacer.gif
  Protein
3.1 g
http://assets3.sparkrecipes.com/spacer.gif

  Vitamin A
0.7 %
http://assets3.sparkrecipes.com/spacer.gif
  Vitamin B-12
0.0 %
http://assets3.sparkrecipes.com/spacer.gif
  Vitamin B-6
2.7 %
http://assets3.sparkrecipes.com/spacer.gif
  Vitamin C
1.1 %
http://assets3.sparkrecipes.com/spacer.gif
  Vitamin D
1.5 %
http://assets3.sparkrecipes.com/spacer.gif
  Vitamin E
1.4 %
http://assets3.sparkrecipes.com/spacer.gif
  Calcium
7.6 %
http://assets3.sparkrecipes.com/spacer.gif
  Copper
14.0 %
http://assets3.sparkrecipes.com/spacer.gif
  Folate
5.6 %
http://assets3.sparkrecipes.com/spacer.gif
  Iron
15.6 %
http://assets3.sparkrecipes.com/spacer.gif
  Magnesium
18.5 %
http://assets3.sparkrecipes.com/spacer.gif
  Manganese
116.0 %
http://assets3.sparkrecipes.com/spacer.gif
  Niacin
2.1 %
http://assets3.sparkrecipes.com/spacer.gif
  Pantothenic Acid    
5.3 %
http://assets3.sparkrecipes.com/spacer.gif
  Phosphorus    
20.7 %
http://assets3.sparkrecipes.com/spacer.gif
  Riboflavin
3.5 %
http://assets3.sparkrecipes.com/spacer.gif
  Selenium
0.2 %
http://assets3.sparkrecipes.com/spacer.gif
  Thiamin
20.0 %
http://assets3.sparkrecipes.com/spacer.gif
  Zinc
10.6 %

http://assets3.sparkrecipes.com/spacer.gif


You can cook this directly in the crockpot if you want but I find it’s easier to clean a bowl than the crockpot (mine is REALLY big).

I’m using the MyFitnessPal app and website to assist me in my weight loss endeavor. The program has calculated that to lost 1 lb a week, my daily caloric intake should be 1,730, this breakfast is 111.7 calories, leaving me plenty of calories for the rest of the day. I use SparkPeople to calculate calories for my recipes. 

I recently bought a webcam so hopefully they'll be some video posts coming up. 

Until next time, 
Kellan